When your marketing and e-commerce imagery lacks that dynamic top-down perspective, you risk presenting products in a way that doesn’t fully showcase their unique design or arrangement. Learn how to take product photos from above, and discover how we use overhead shots to enhance visual storytelling for products.
How to Take Product Photos From Above
Overhead product photography requires a technical setup, including a sturdy tripod with a horizontal arm or C-stand, manual camera settings with narrow apertures, and soft diffused lighting. Our workflow also covers thoughtful styling with complementary props, strategic composition, plus carefully selected backgrounds and textures that align with our clients’ brand aesthetic.
Our product photographers utilize these overhead photography techniques to create compelling visual stories that captivate customers and drive conversions.
1. Preparation and Setup
This foundational stage results in a smooth photo shoot process and directly impacts the quality and consistency of overhead product images.
Selecting the Right Gear
Our studio comes with a complete set of photography equipment that streamlines our workflow and provides greater creative control.
- Prepare a DSLR with a remote shutter control to minimize camera shake, as well as tethering tools to view images on a larger screen in real-time.
- Invest in a sturdy tripod with a horizontal arm or a C-stand to position your camera directly above the product.
- Select macro lenses for small products to capture intricate details, or standard prime lenses for larger items for sharpness.
Styling Products and Props Strategically
This step enhances the aesthetic appeal and storytelling capabilities of your overhead photos.
- Clean and prepare products meticulously, removing any dust, smudges, or imperfections before placing them.
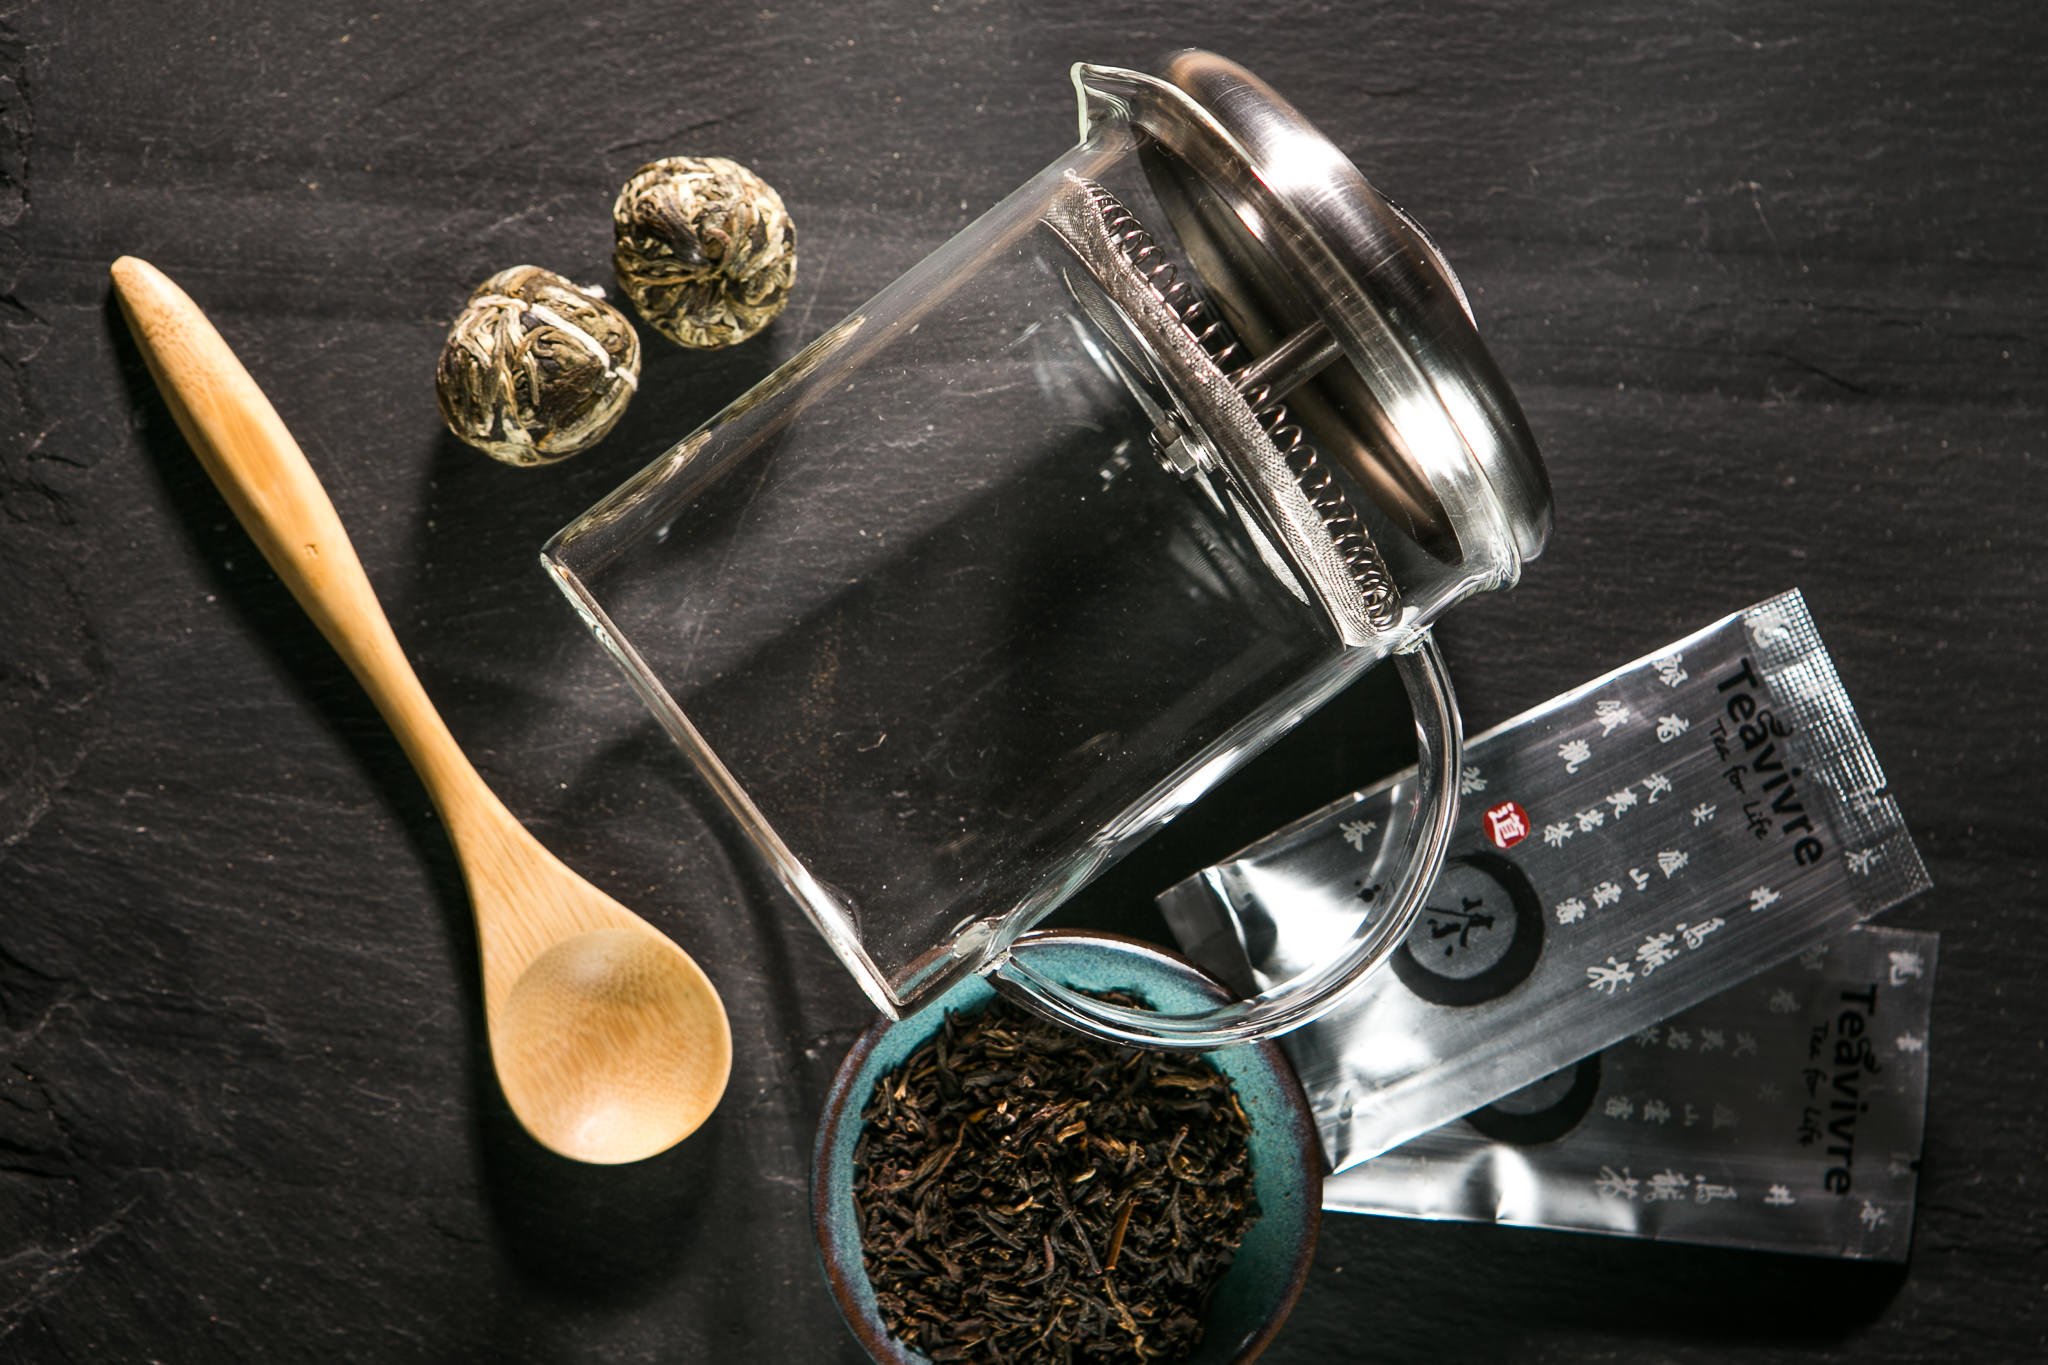
- Use props — like small tools, produce, or complementary items — to help tell the story, yet don’t let them cover or overshadow your main subject.
- Arrange products to highlight their key features and benefits to achieve product differentiation by considering the best angle and how light interacts with the surfaces.
2. Mastering Overhead Shooting Techniques
With our keen attention to detail, we apply these technical aspects to produce images that are both visually stunning and professionally polished, even when shot from above.
Achieving Perfect Alignment and Focus Using Camera Settings
Precise camera settings and meticulous alignment keep products perfectly in focus and positioned advantageously within the frame.
- Set the camera to manual mode (M) to gain full control over aperture, shutter speed, and ISO for consistent exposure.
- Choose a narrow aperture (f/8 to f/16) for a deep depth of field, keeping both the product and any props entirely in focus.
- Utilize Live View on the camera to fine-tune the camera’s position for perfect alignment directly above the product.
Illuminating the Overhead Scene
Effective lighting sculpts the product, highlights its textures, and sets the mood for the pictures.
- Use soft, diffused lighting, such as a large softbox or an octabox, to minimize harsh shadows and create even illumination across the scene.
- Position the main light source to one side or slightly behind the product to add dimension and prevent a flat appearance.
- Introduce fill light or reflectors on the opposite side of the main light to gently lift shadows and reveal more detail.
3. Incorporating Creative Compositions and Backgrounds
These elements work in tandem to create visually captivating images that draw the viewer’s eye and enhance the product’s appeal to attract buyers.
Enhancing Visual Composition
These compositional techniques make product photos engaging and aesthetically pleasing, even with the challenge of capturing them from above.
- Apply the rule of thirds or the golden ratio to create visual hierarchy and strategically showcase the product’s most important details.
- Use negative space and intentionally leave empty areas around the product to create a sense of simplicity and focus.
- Utilize leading lines, such as the edges of props or textures, to guide the viewer’s gaze towards the main product.
Utilizing Backgrounds and Textures
We use these techniques to find the right background and texture to provide context, add visual interest, and complement products without overwhelming them.
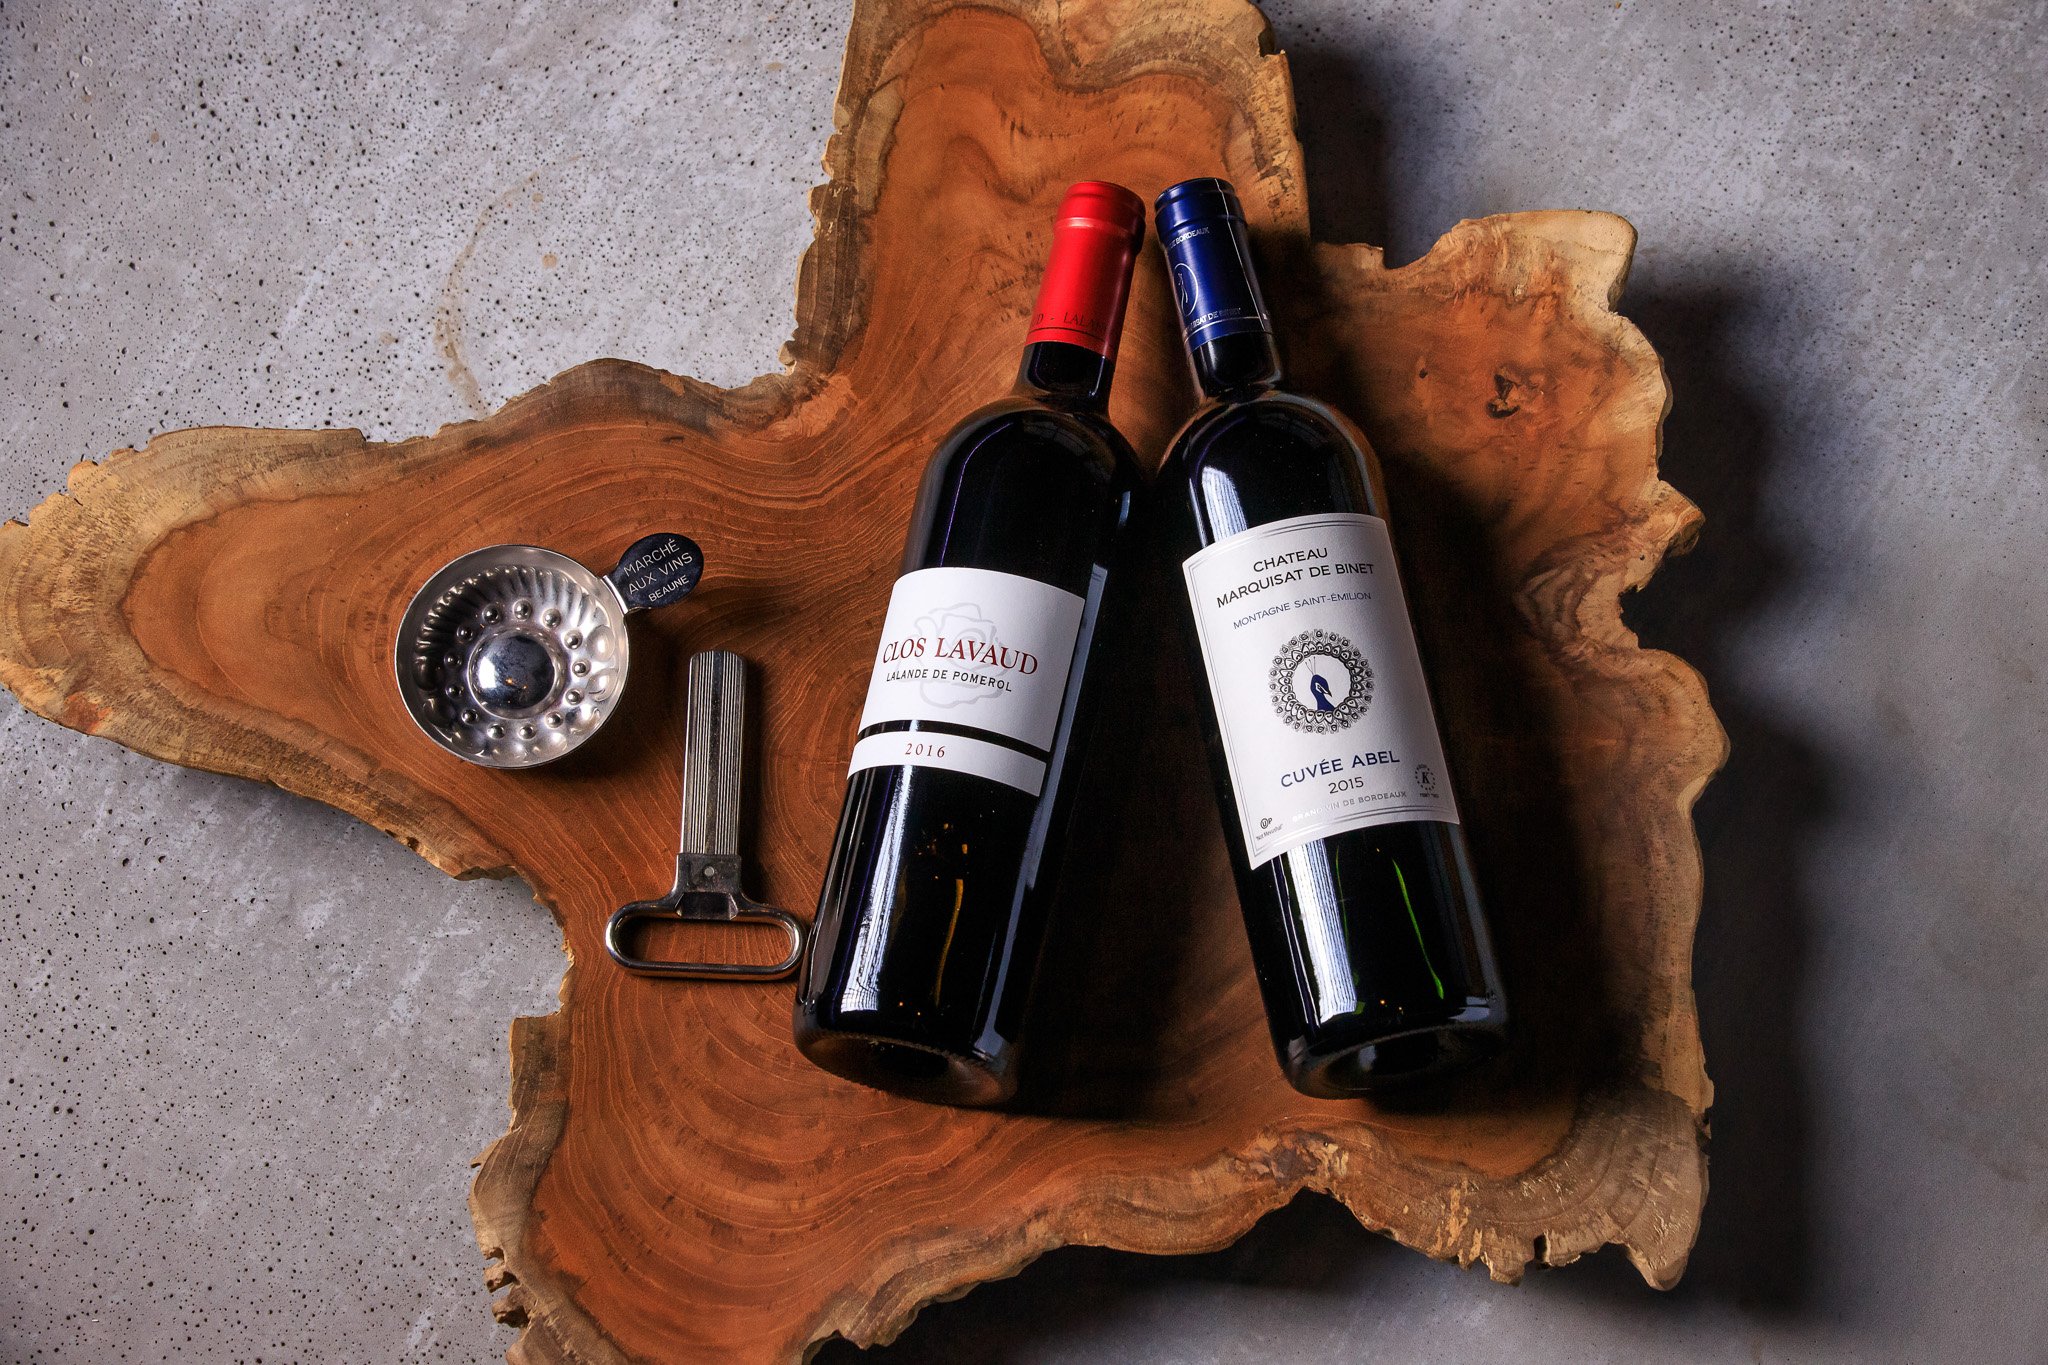
- Experiment with different textures, like wood, concrete, fabric, or even crumpled paper to add tactile appeal and visual depth.
- Consider the brand’s aesthetic and the product’s theme to reinforce the brand message.
- Use seamless paper rolls or large boards for versatile and consistent backgrounds, allowing for easy color changes and clean setups.
Common Concerns in Overhead Product Photos
At Bauman Photographers, we address these pain points directly through our expertise and specialized techniques. This enables our product photographers to deliver sharp, beautifully lit, and perfectly composed overhead shots that showcase the products at their best.
| Common Concerns | Our Solutions |
| Blurry or out-of-focus images | Use a tripod, manual focus on the product, increase aperture (f/8-f/11), use a timer or remote shutter |
| Uneven lighting/harsh shadows | Use multiple light sources, add diffusers, position lights at 45-degree angles, use reflectors to fill shadows |
| Colors look washed out | Adjust exposure settings, set proper white balance, use manual camera mode |
| Composition looks cramped | Increase camera height, use a longer focal length, leave more space around the product |
| Lighting looks flat | Add some directional lighting, create subtle shadows, vary light intensities |
Related Questions
What Is Your Process of Editing Overhead Product Photos?
Our editing process for overhead product photos typically involves color correction and exposure adjustments for accuracy. We also focus on sharpening details and carefully removing any dust or imperfections to present a clean, polished final image. Additionally, we will export your images at a resolution suitable for their intended use.
Where Can I Use Overhead Shots of Products?
You can effectively use overhead shots of products on e-commerce websites to showcase product arrangements and scale, or on social media platforms for engaging flat lay compositions. These shots are also excellent for marketing materials, like brochures or ad campaigns, to highlight product collections.
What Is the Ideal Distance and Height for Shooting Product Images From Above?
With product images shot from above, the distance and height largely depend on the size of the product and the desired field of view. Generally, our photographers keep it high enough to capture the entire product and any styled elements within the frame without distortion. This is usually around 2-4 feet for small items, like jewelry, and 4-6 feet or more for flat lays.
Conclusion
Shooting product images from above allows you to showcase your items in unique, fresh, and captivating perspectives. With our full-service product photography, we can capture overhead shots of your products to highlight details and create organized marketing campaigns that help you attract more buyers.